-
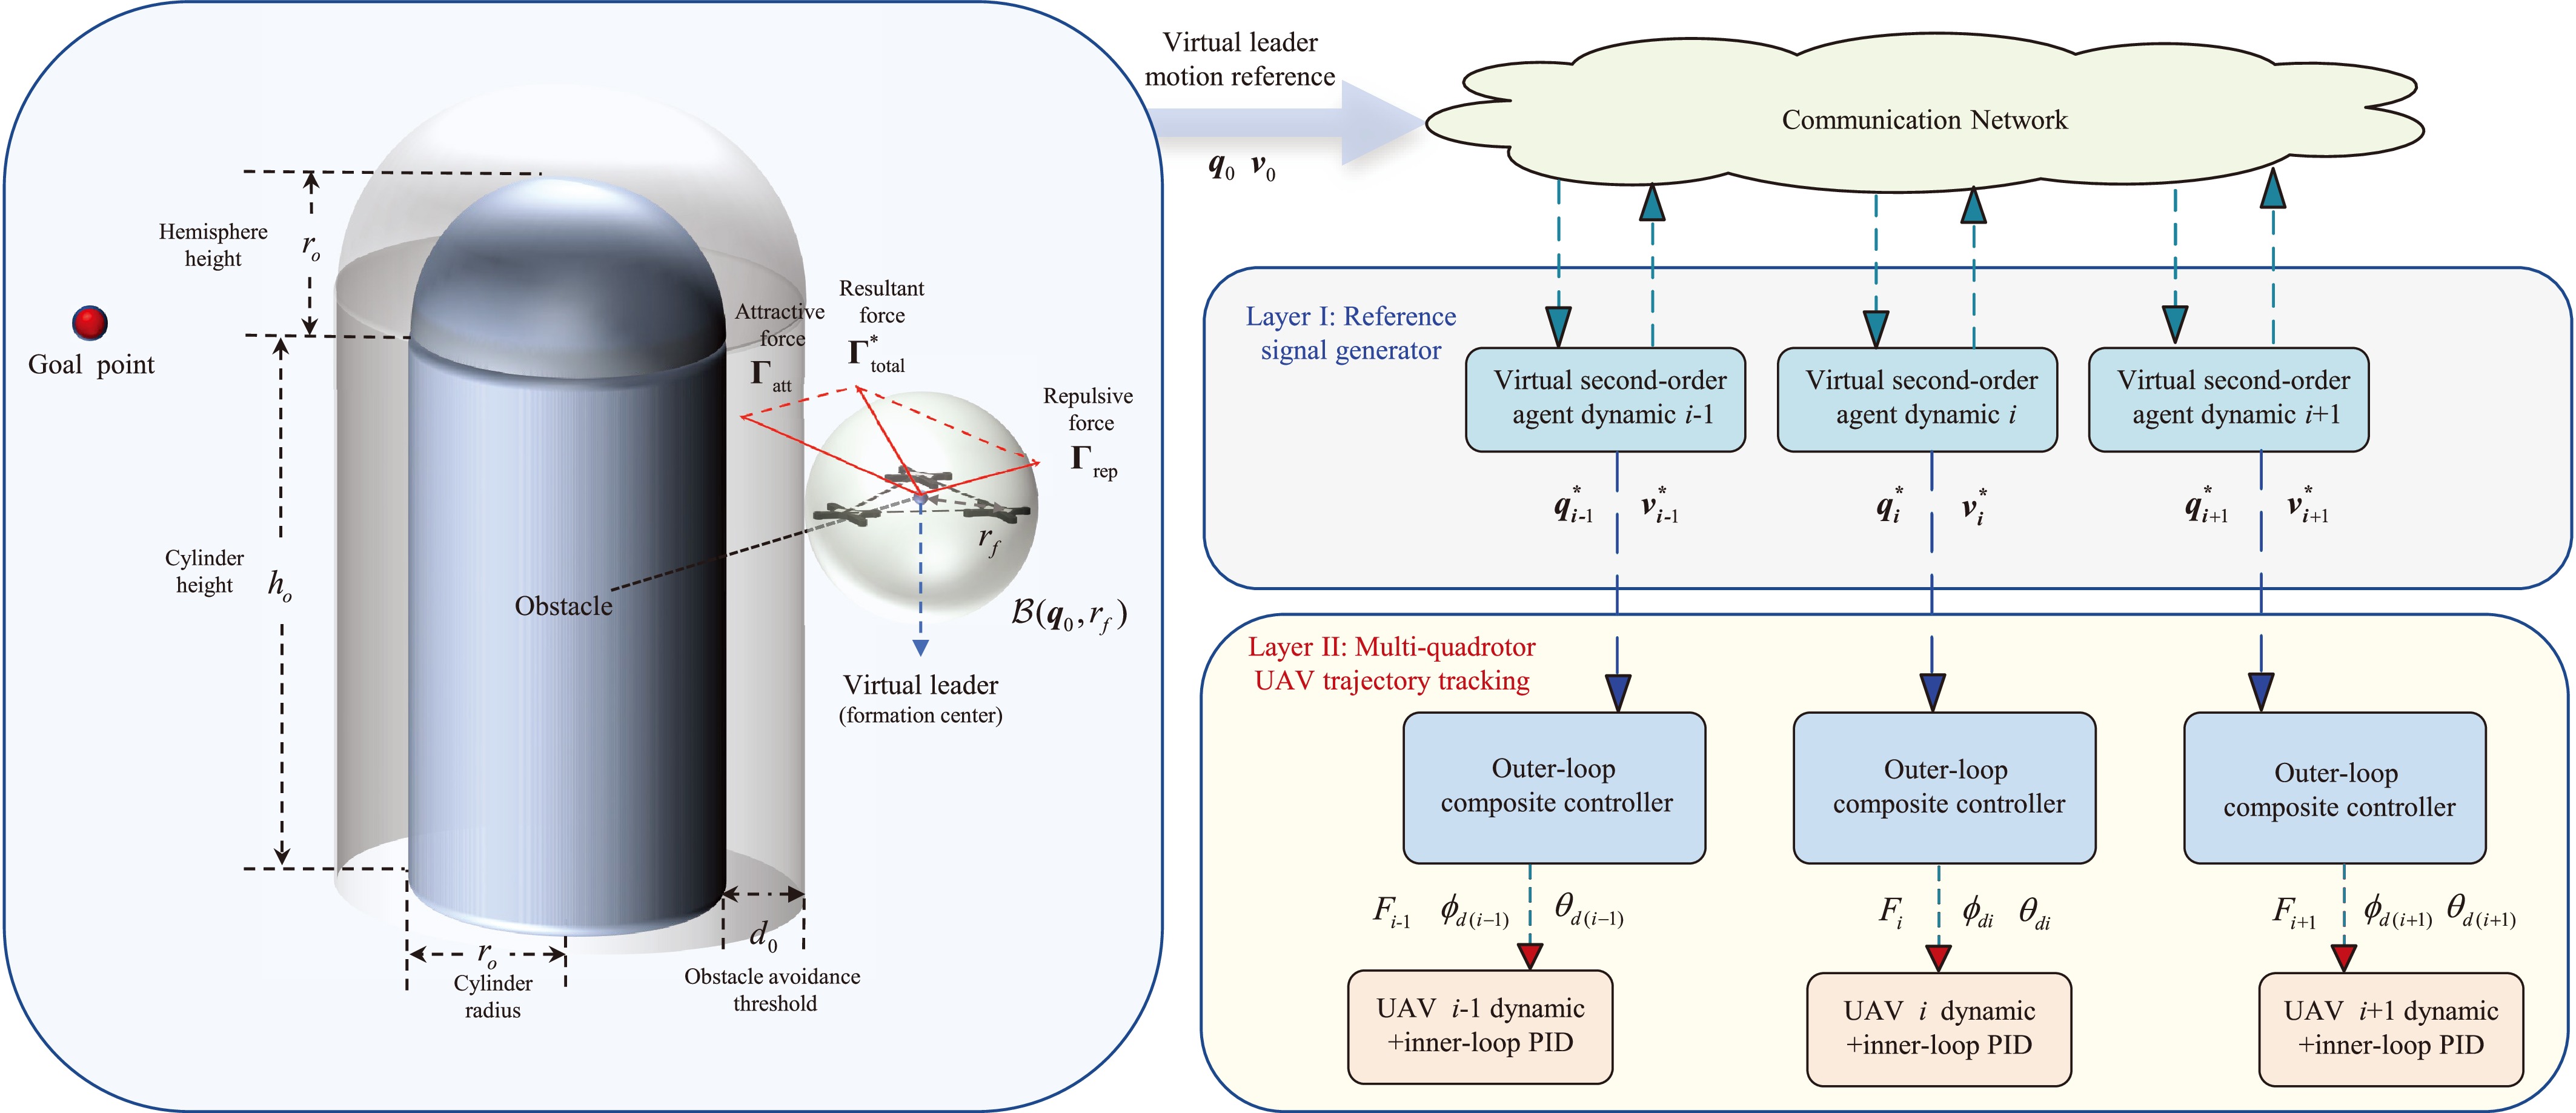
Figure 1.
Block diagram of the hierarchical distributed formation obstacle avoidance control scheme.
-
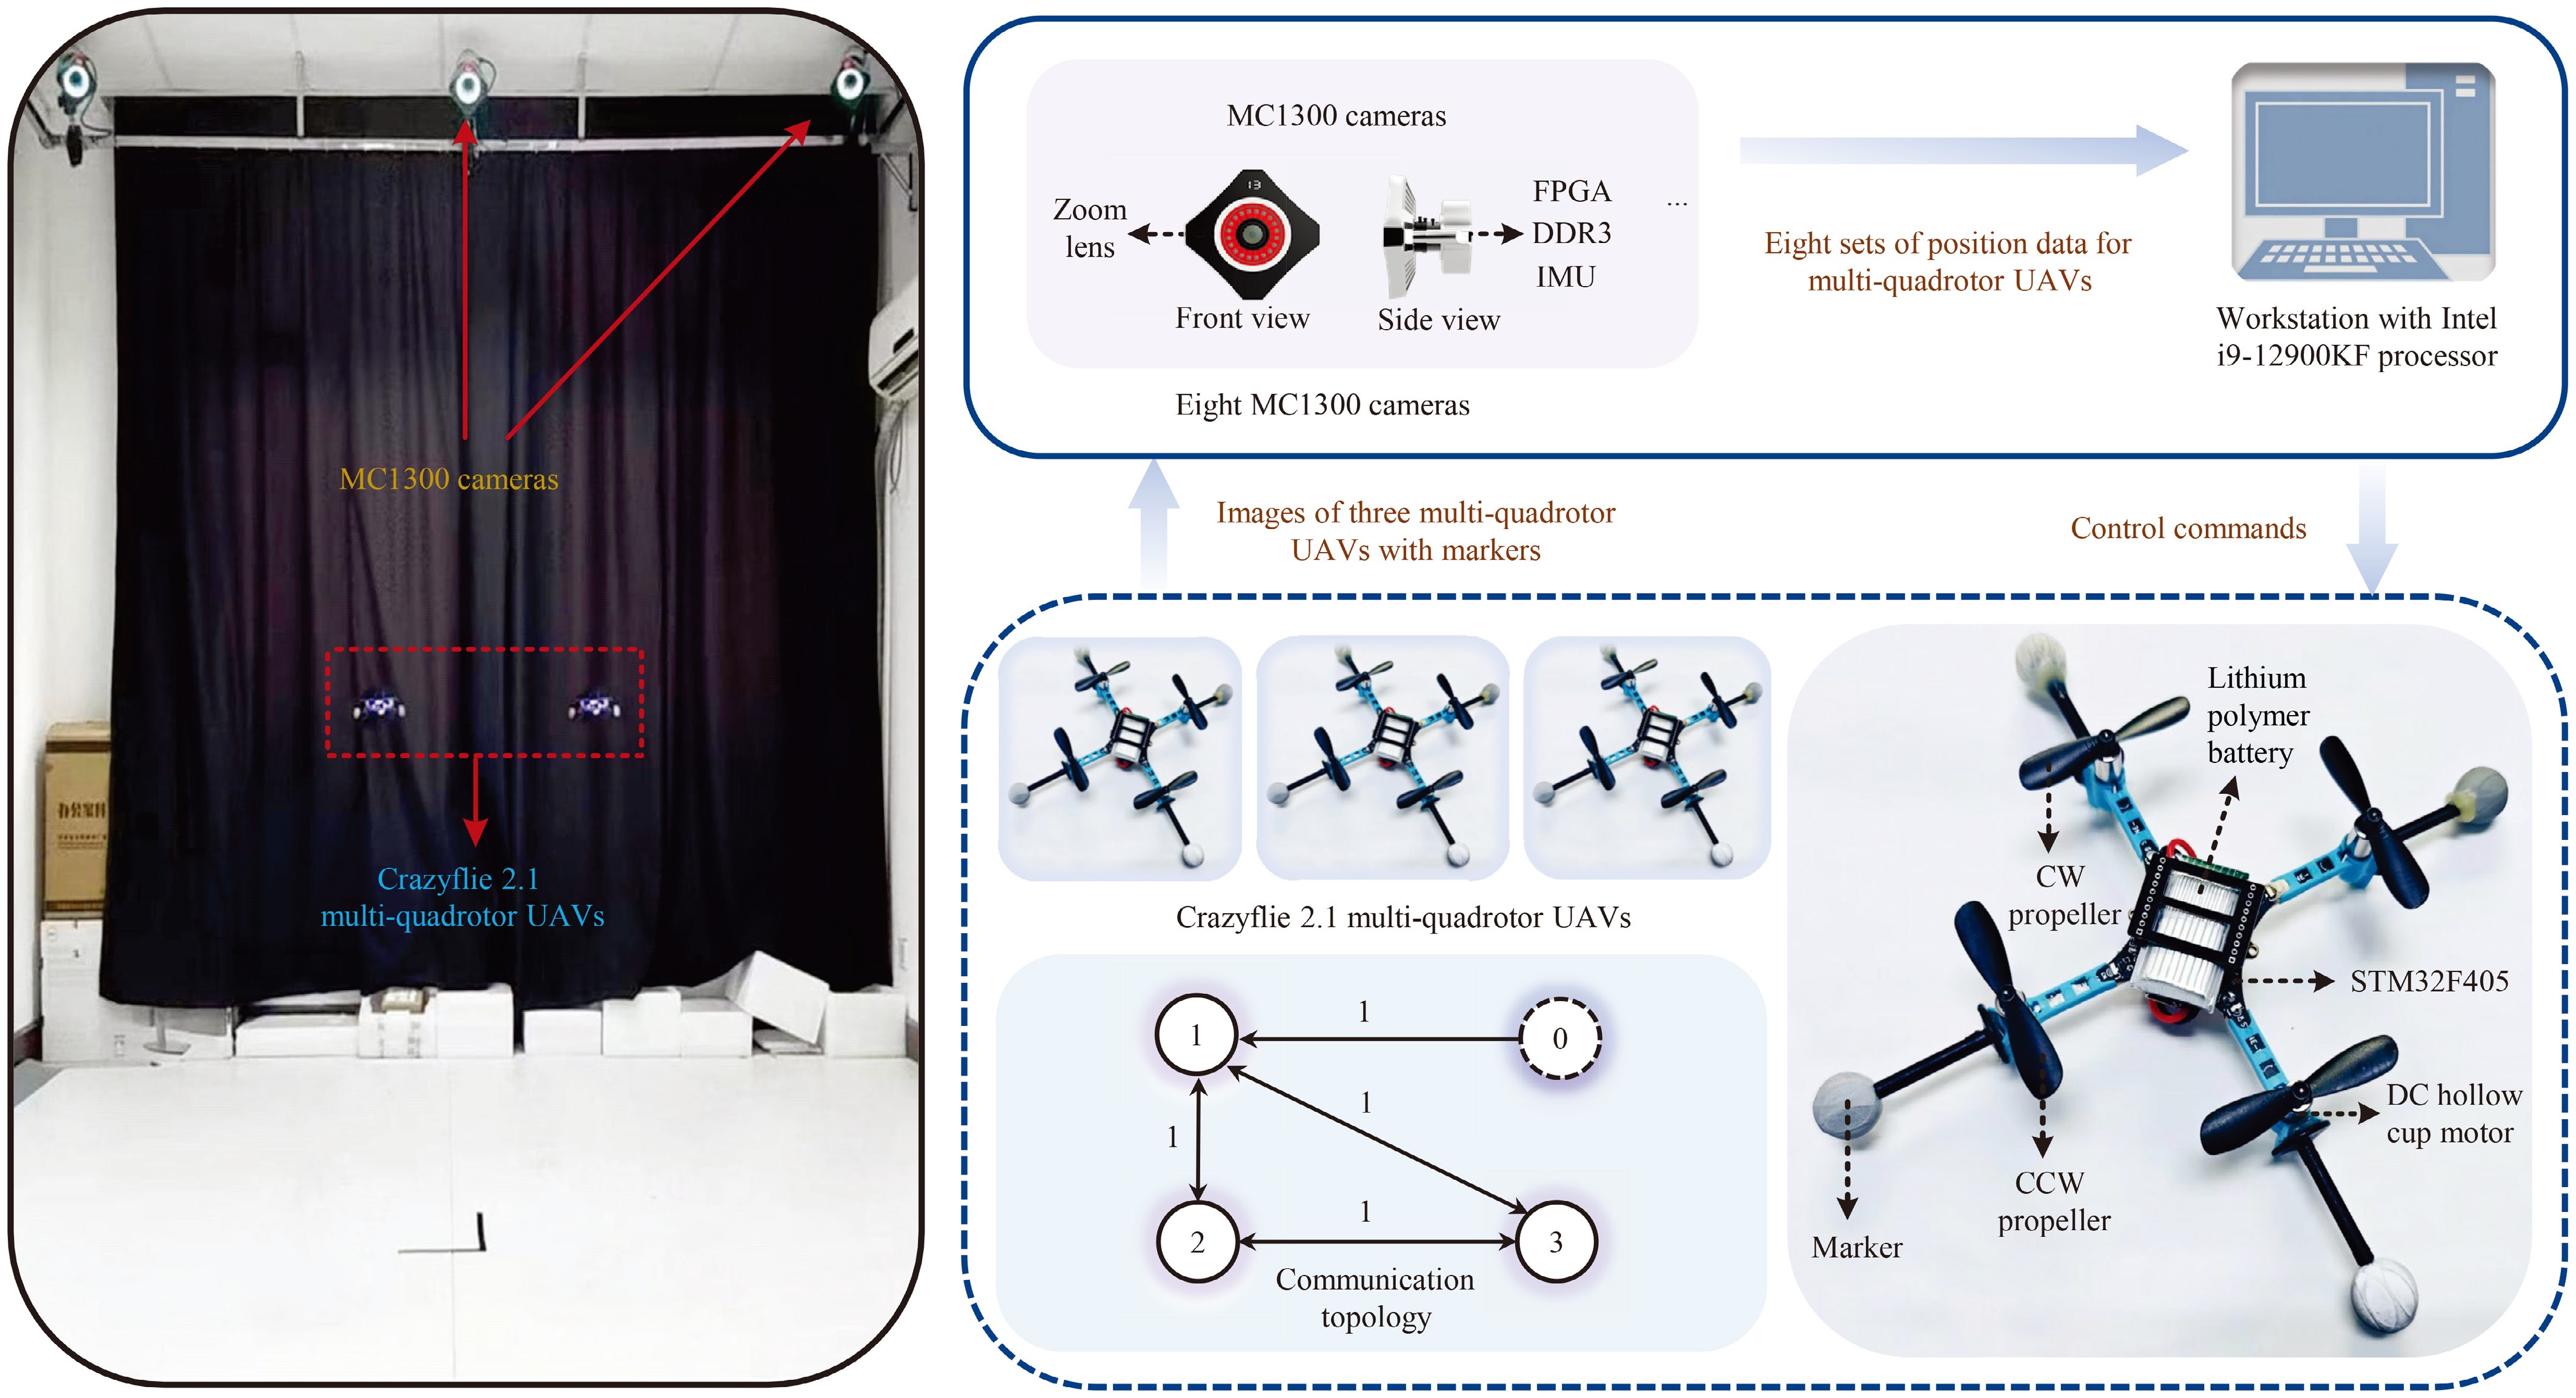
Figure 2.
The experimental platform.
-
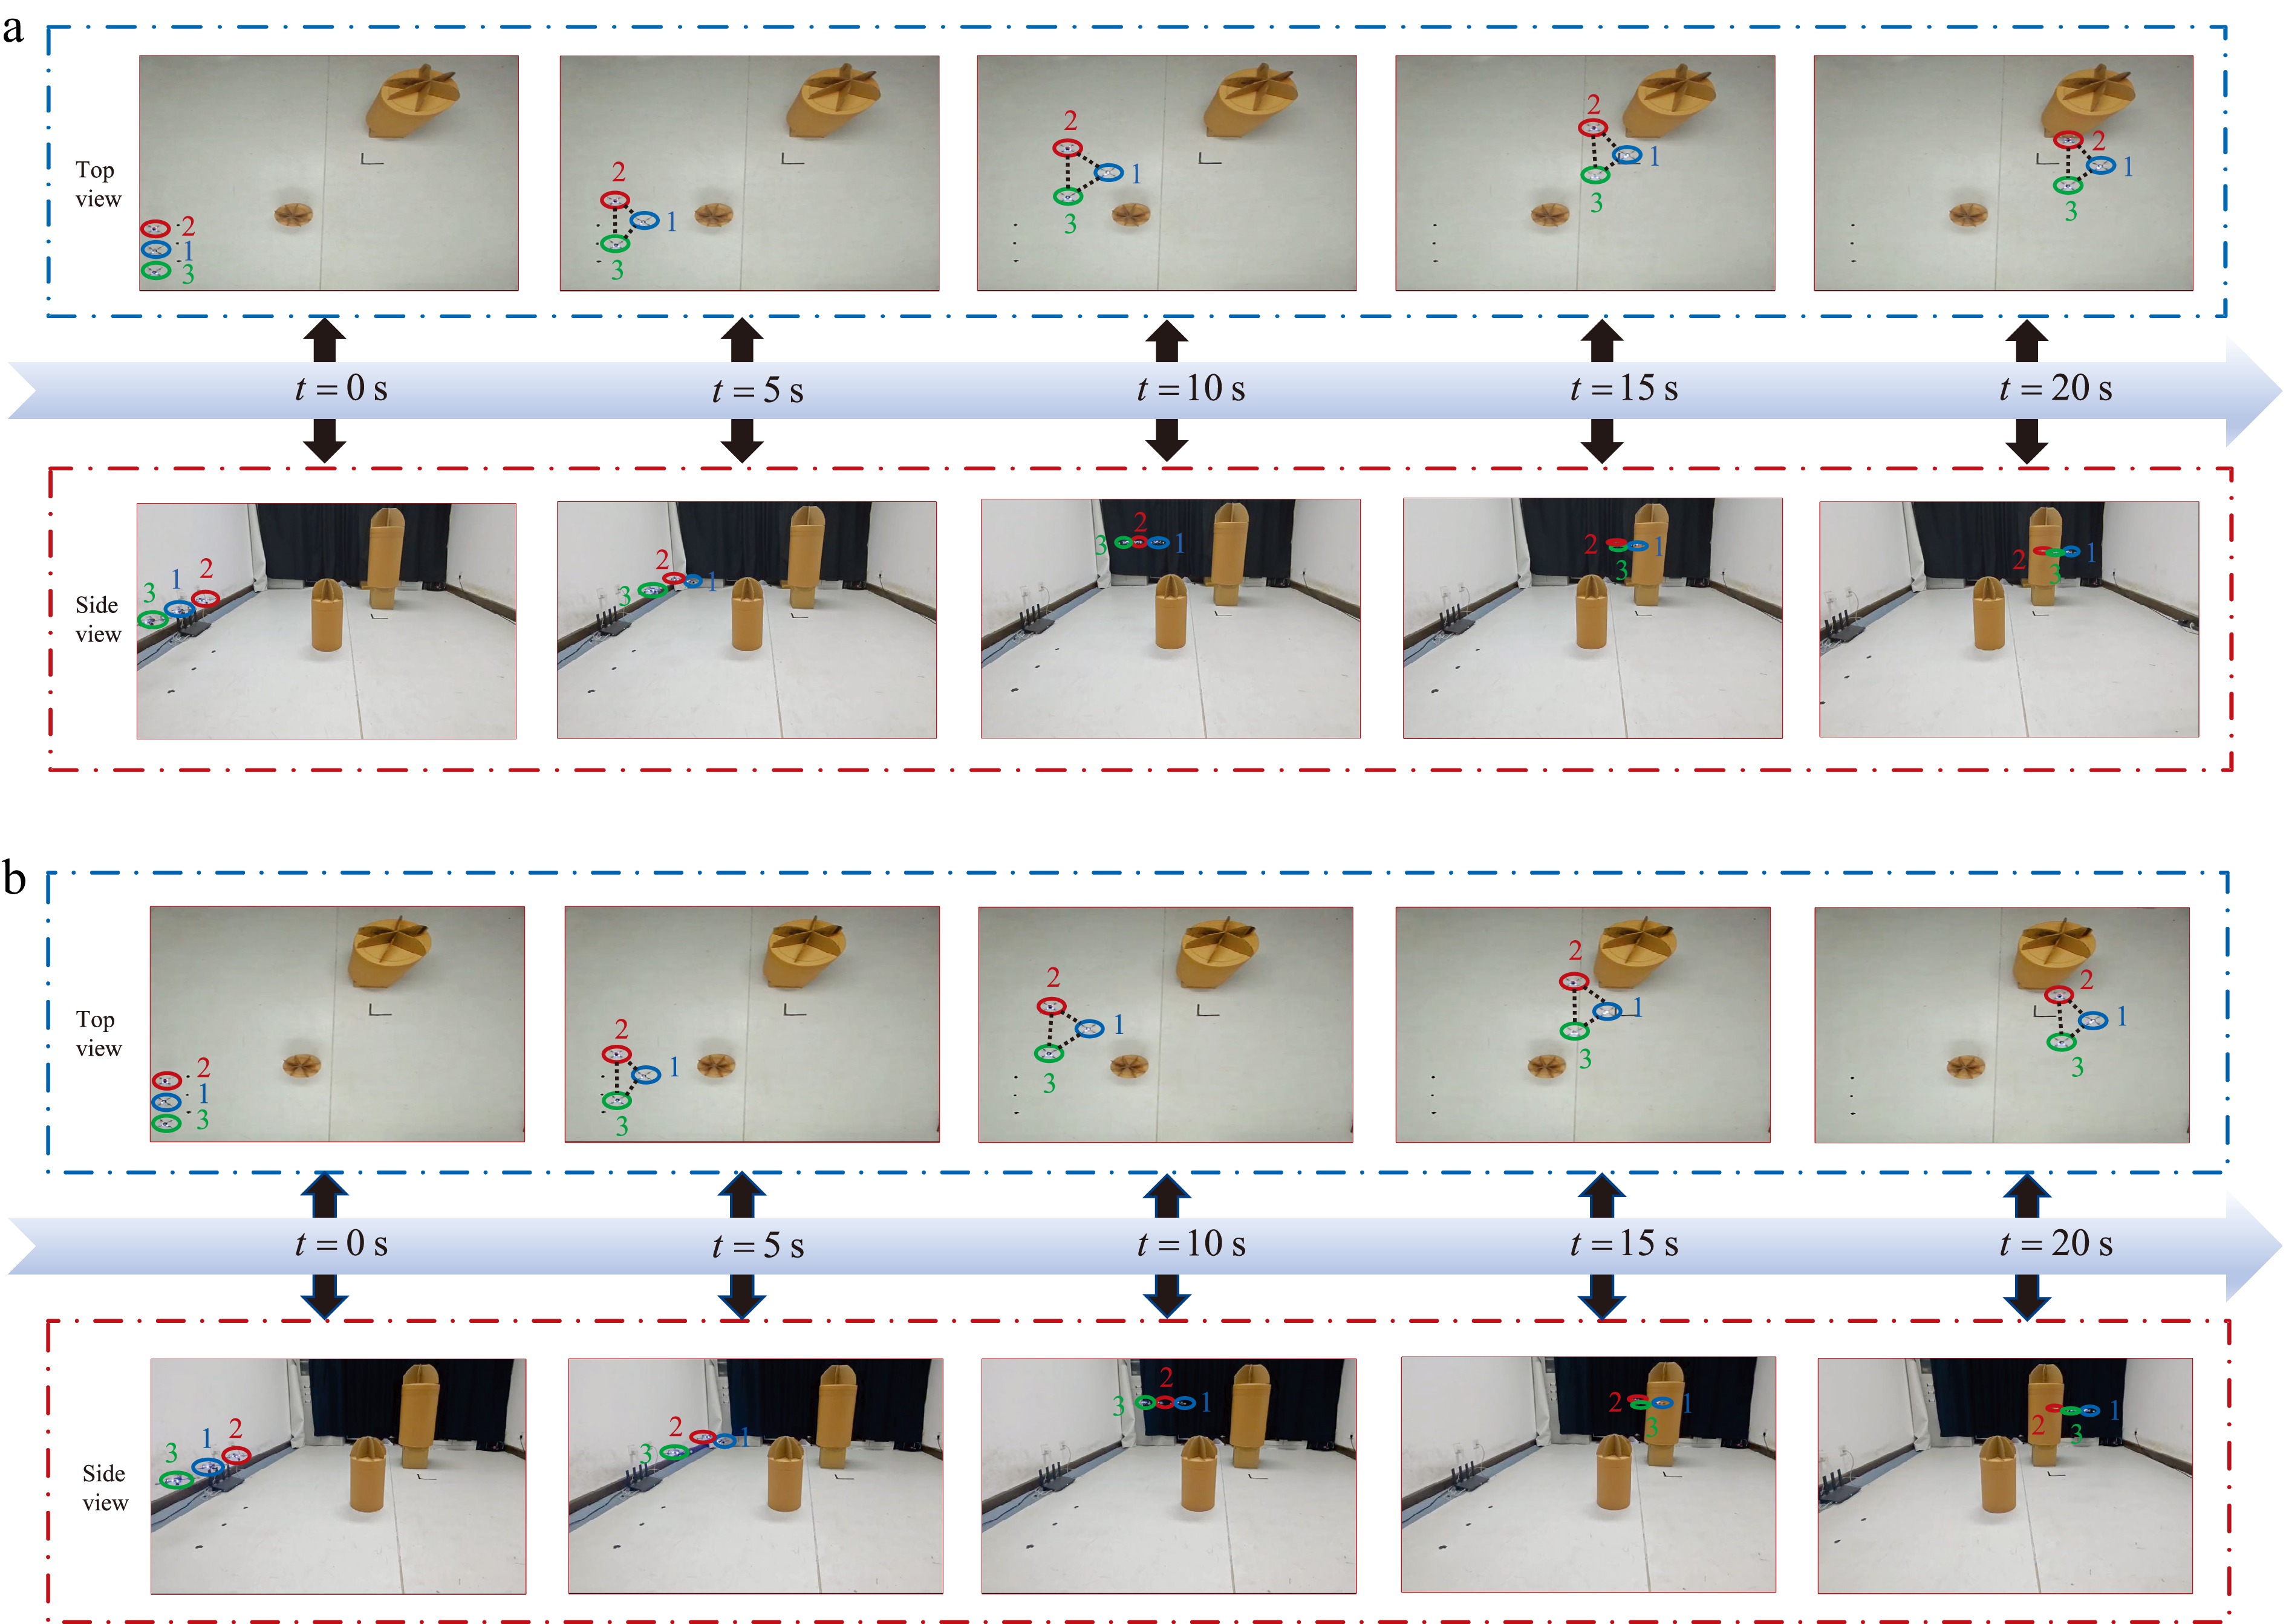
Figure 3.
Experimental images and multi-quadrotor UAV positions at different time instants. (a) Real-time positions of the multi-quadrotor UAVs in example 1. (b) Real-time positions of the multi-quadrotor UAVs in example 2.
-
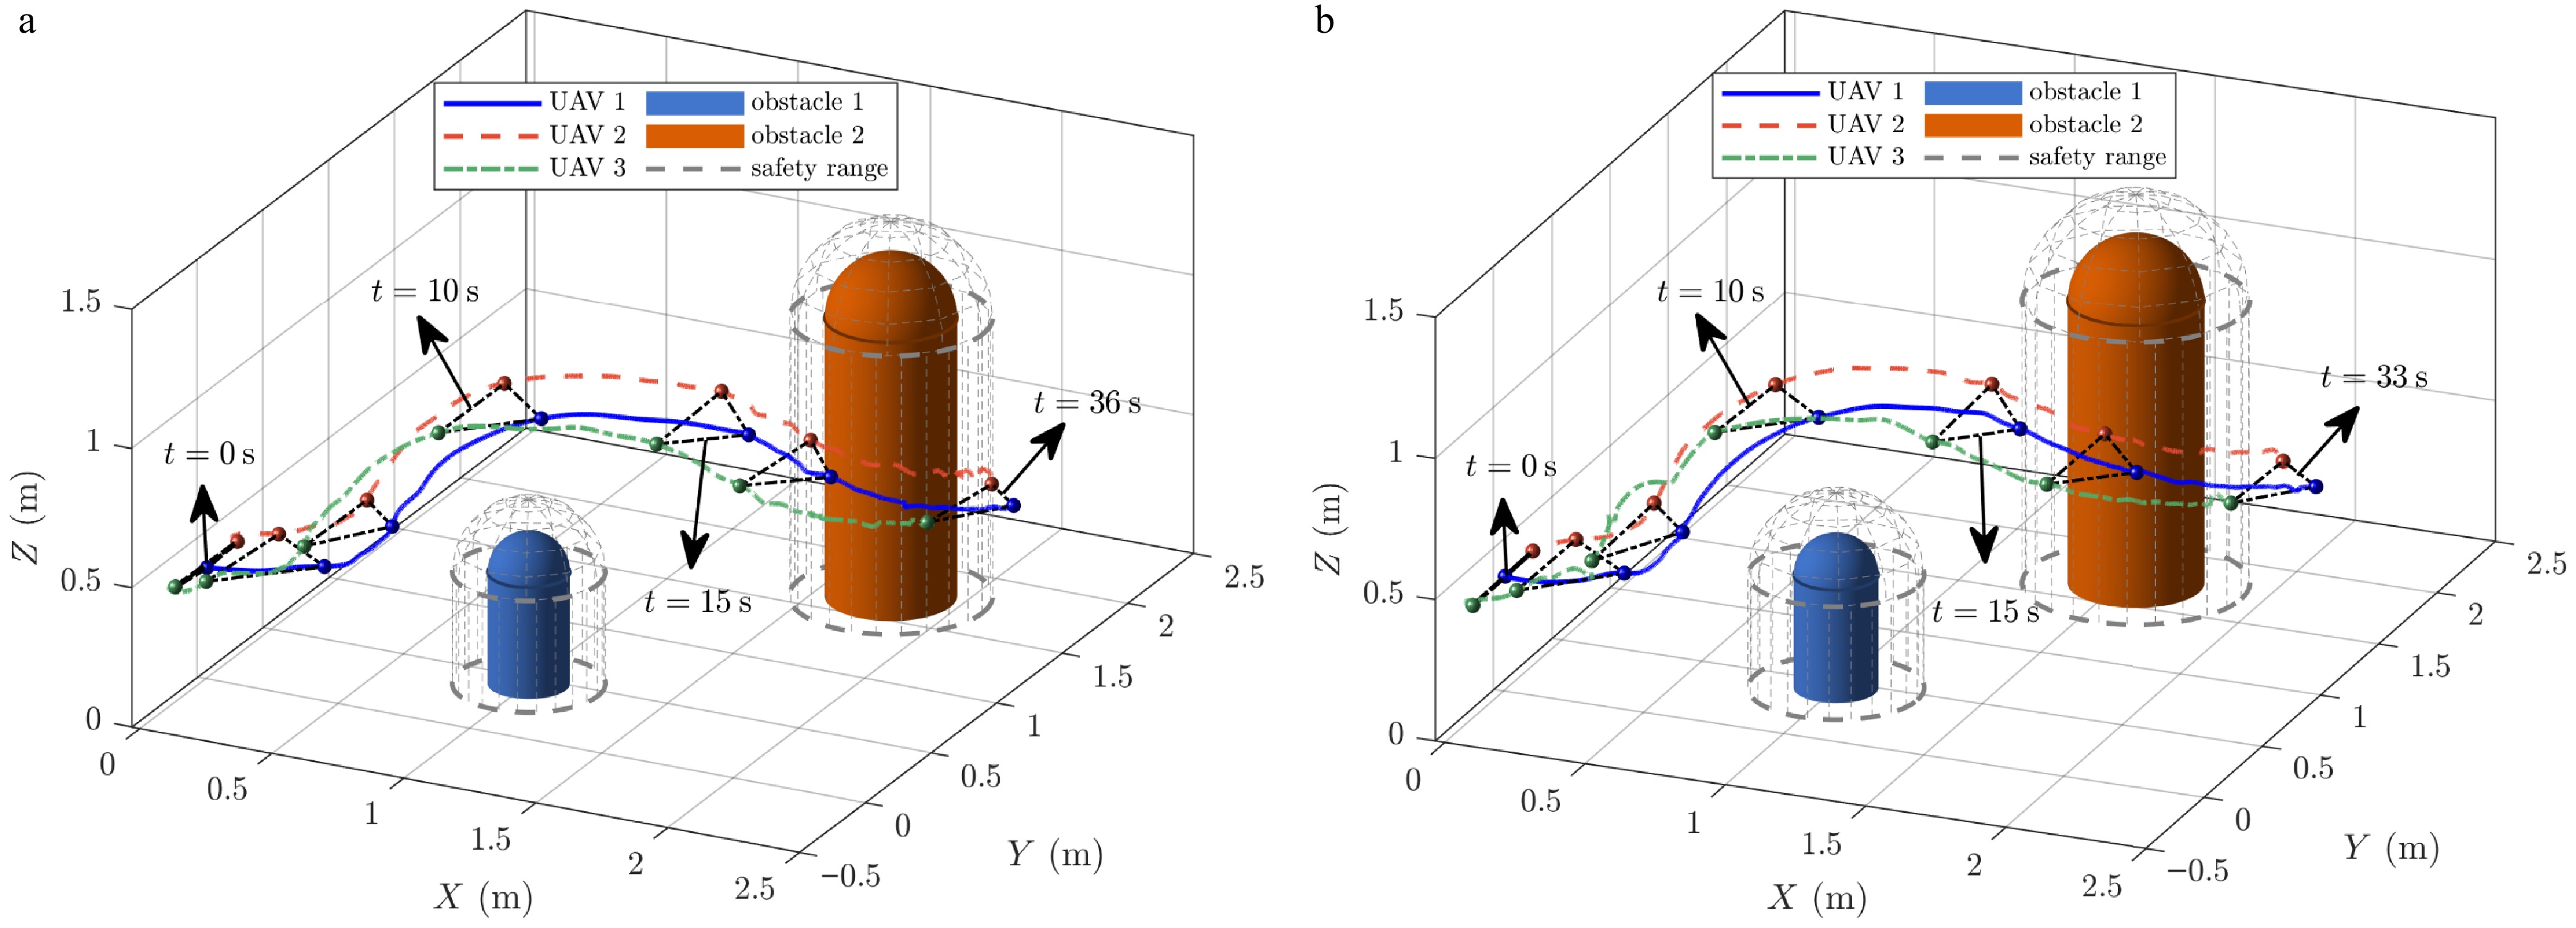
Figure 4.
Trajectories of the multi-quadrotor UAVs in 3D space. (a) 3D trajectories of the formation obstacle avoidance maneuver in example 1. (b) 3D trajectories of the formation obstacle avoidance maneuver in example 2.
-
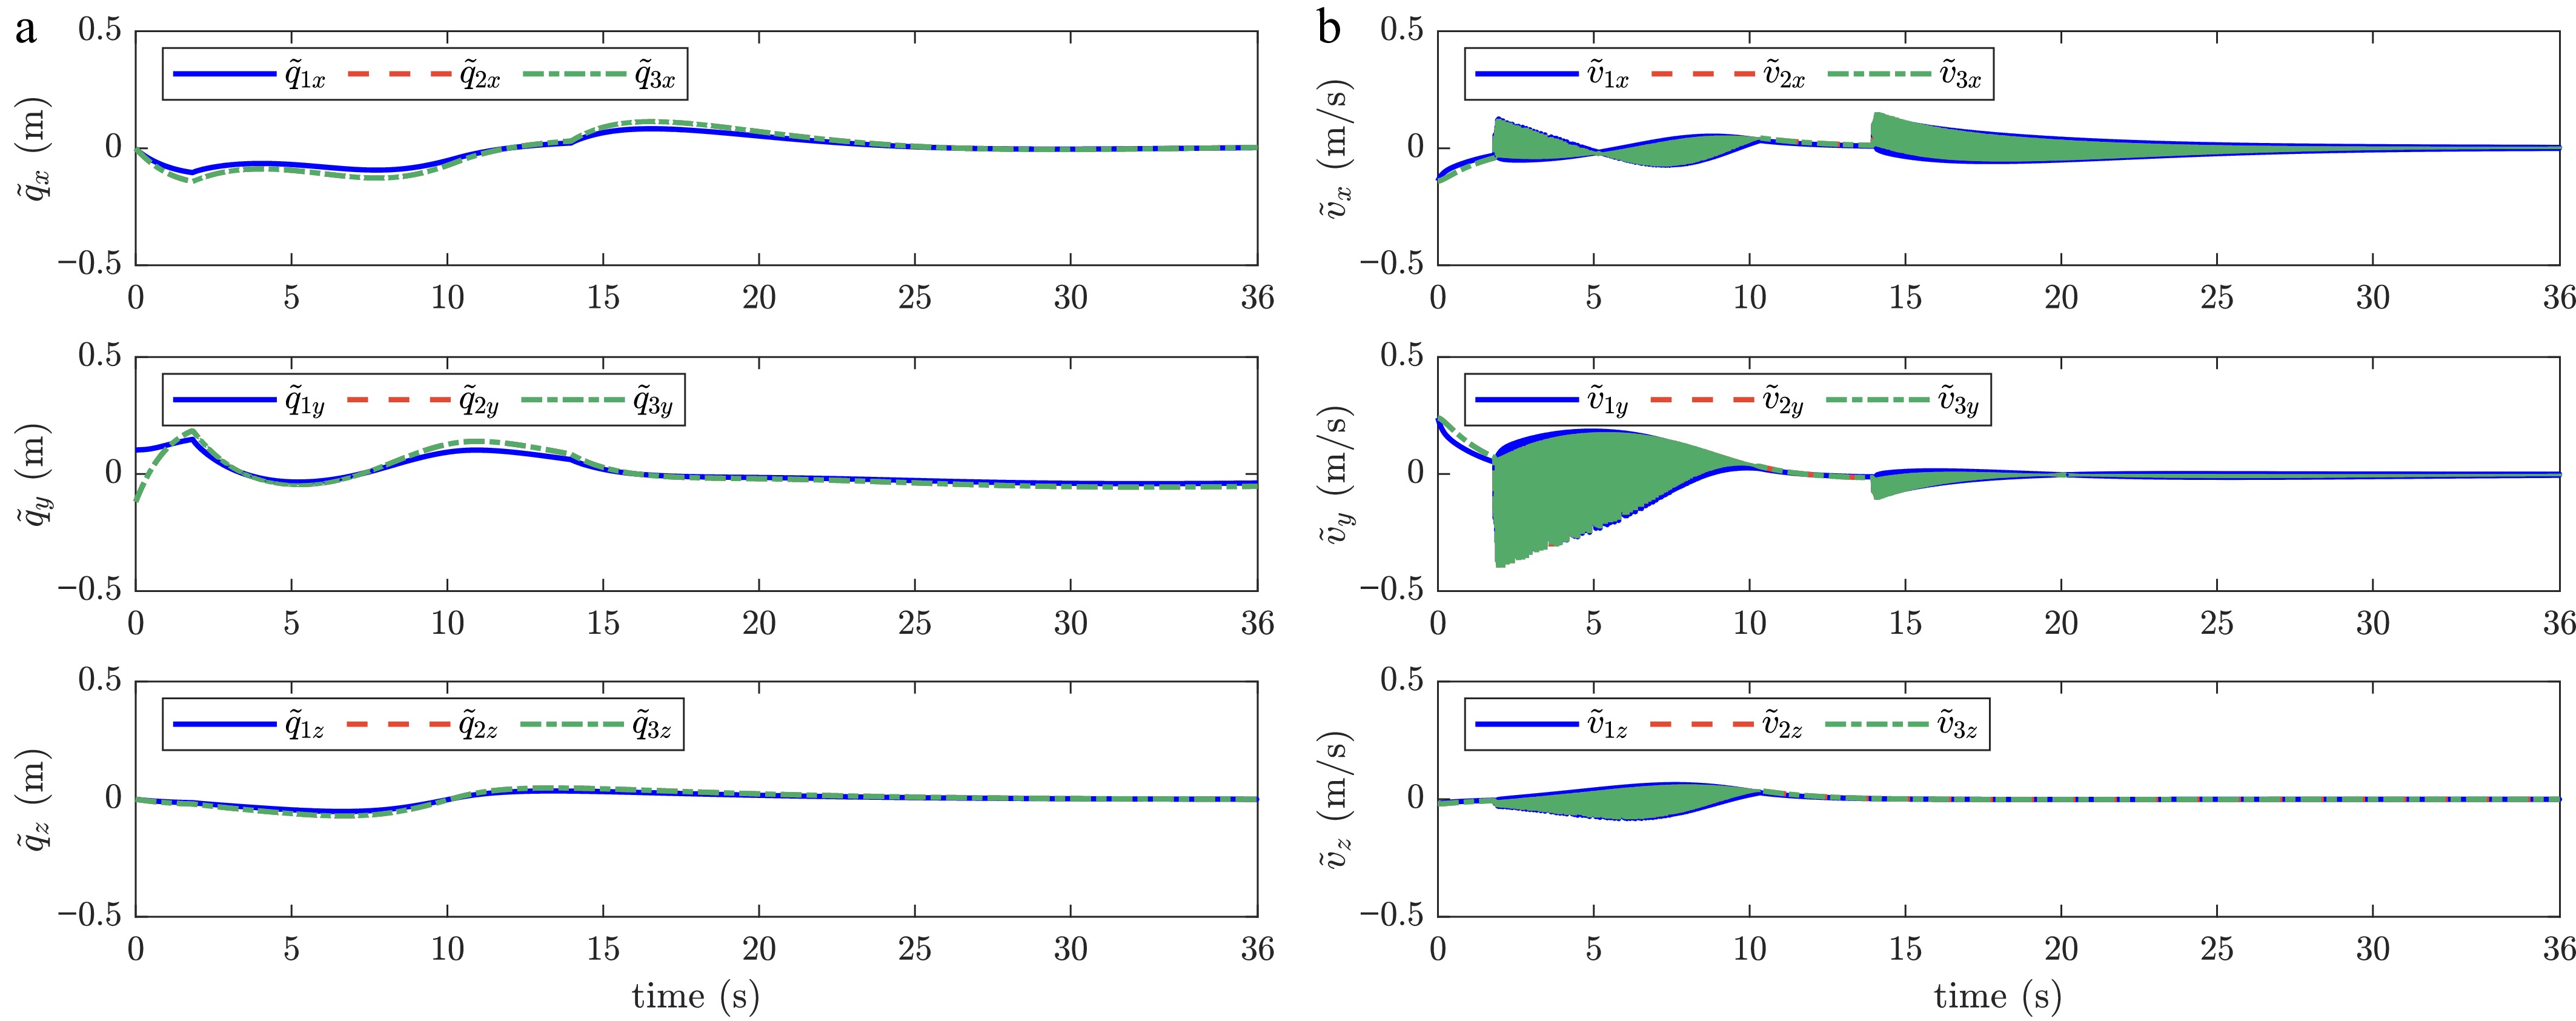
Figure 5.
Response curves of the formation tracking errors under the distributed reference signal generator given by Eqs. (16) and (17) in example 1. (a) Response curves of the formation position errors. (b) Response curves of the formation velocity errors.
-
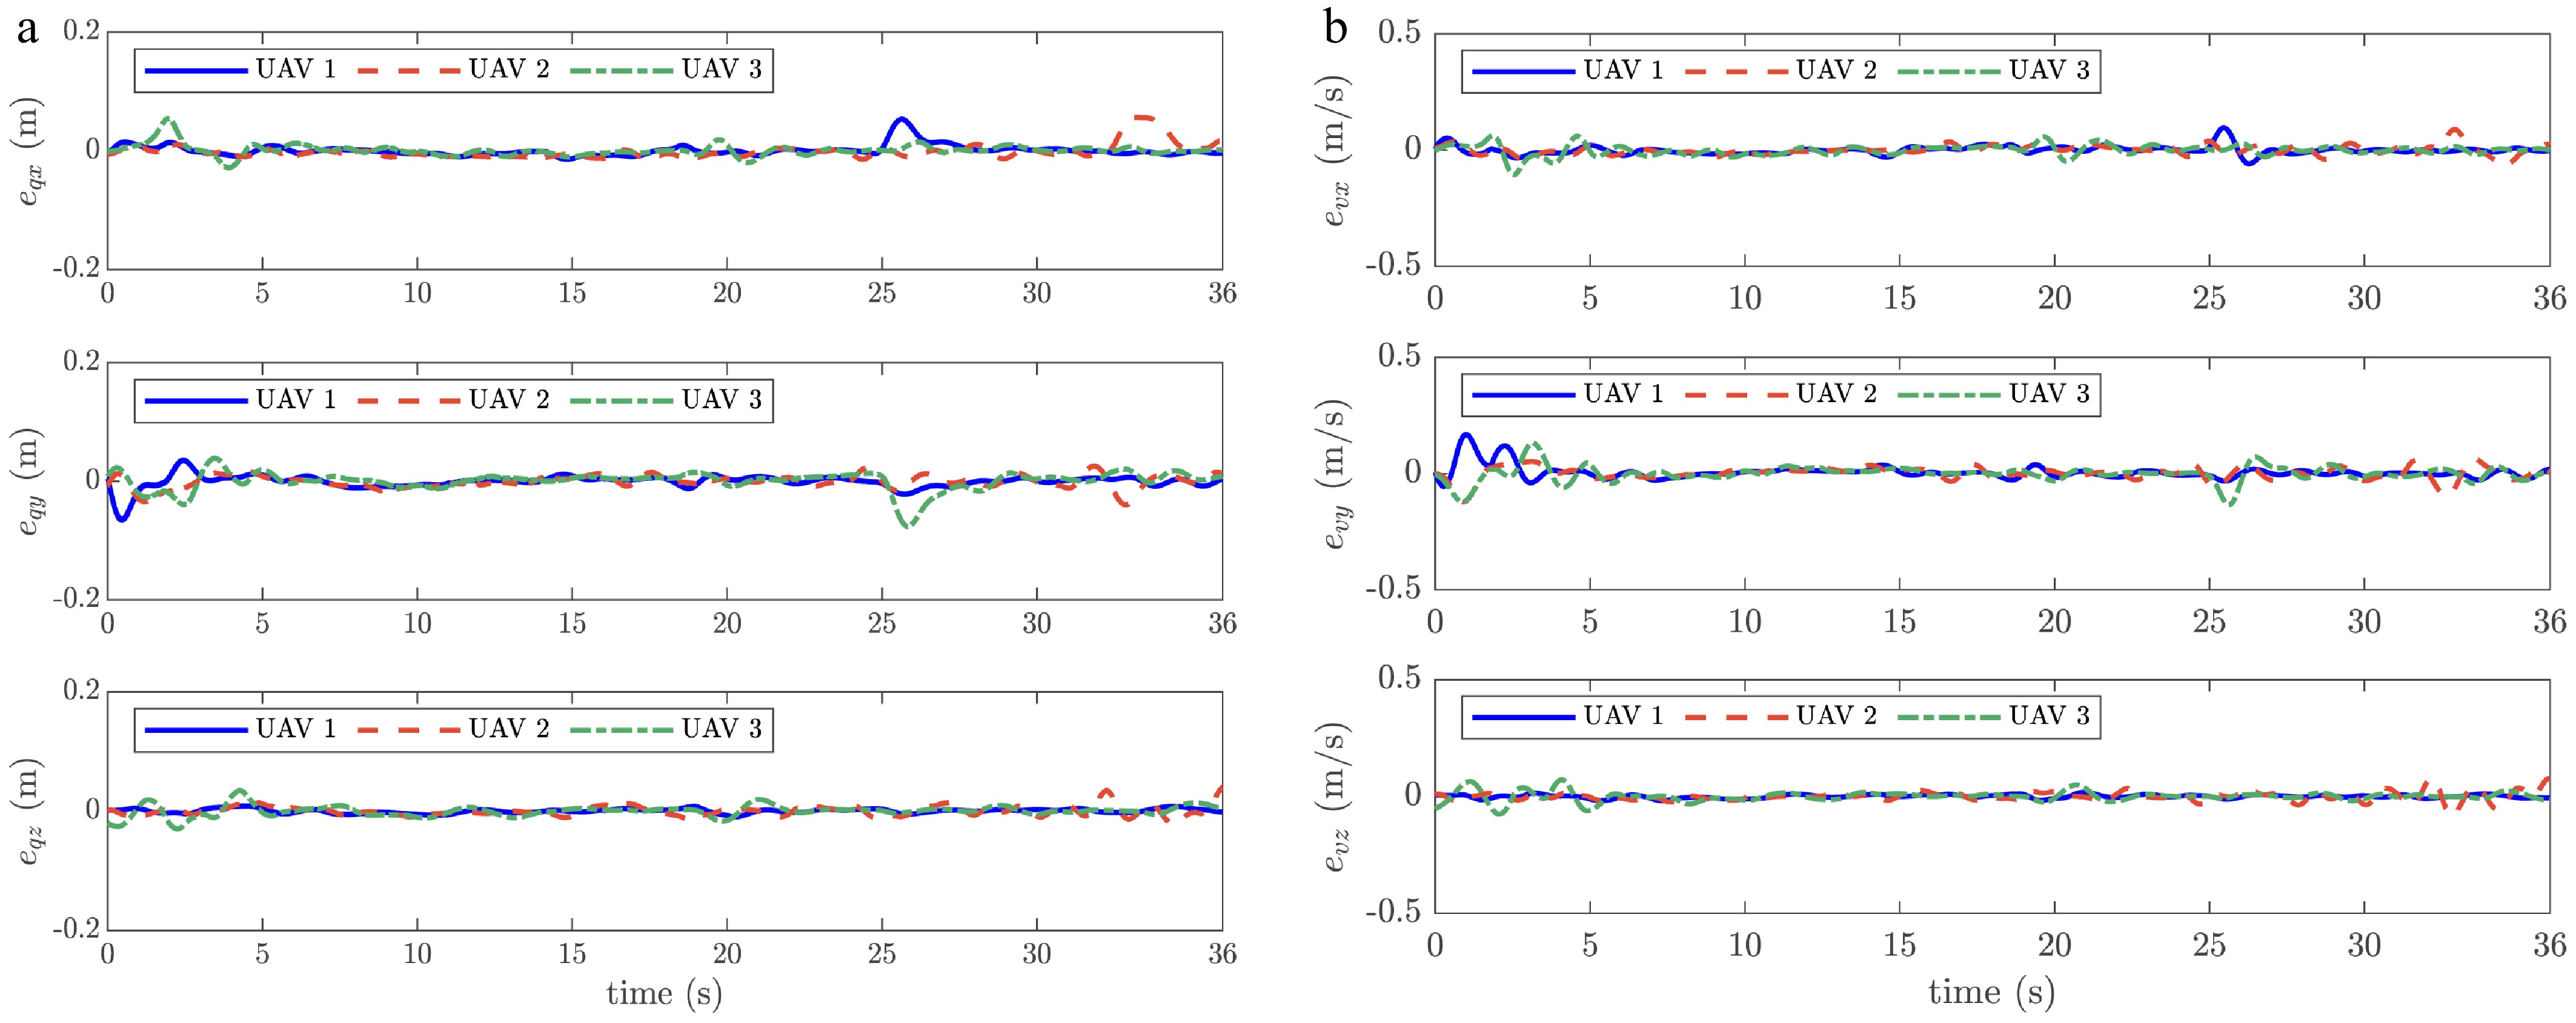
Figure 6.
Response curves of the multi-quadrotor UAVs' trajectory tracking errors under the composite controller given by Eq. (28) in example 1. (a) Response curves of the position tracking errors. (b) Response curves of the velocity tracking errors.
-
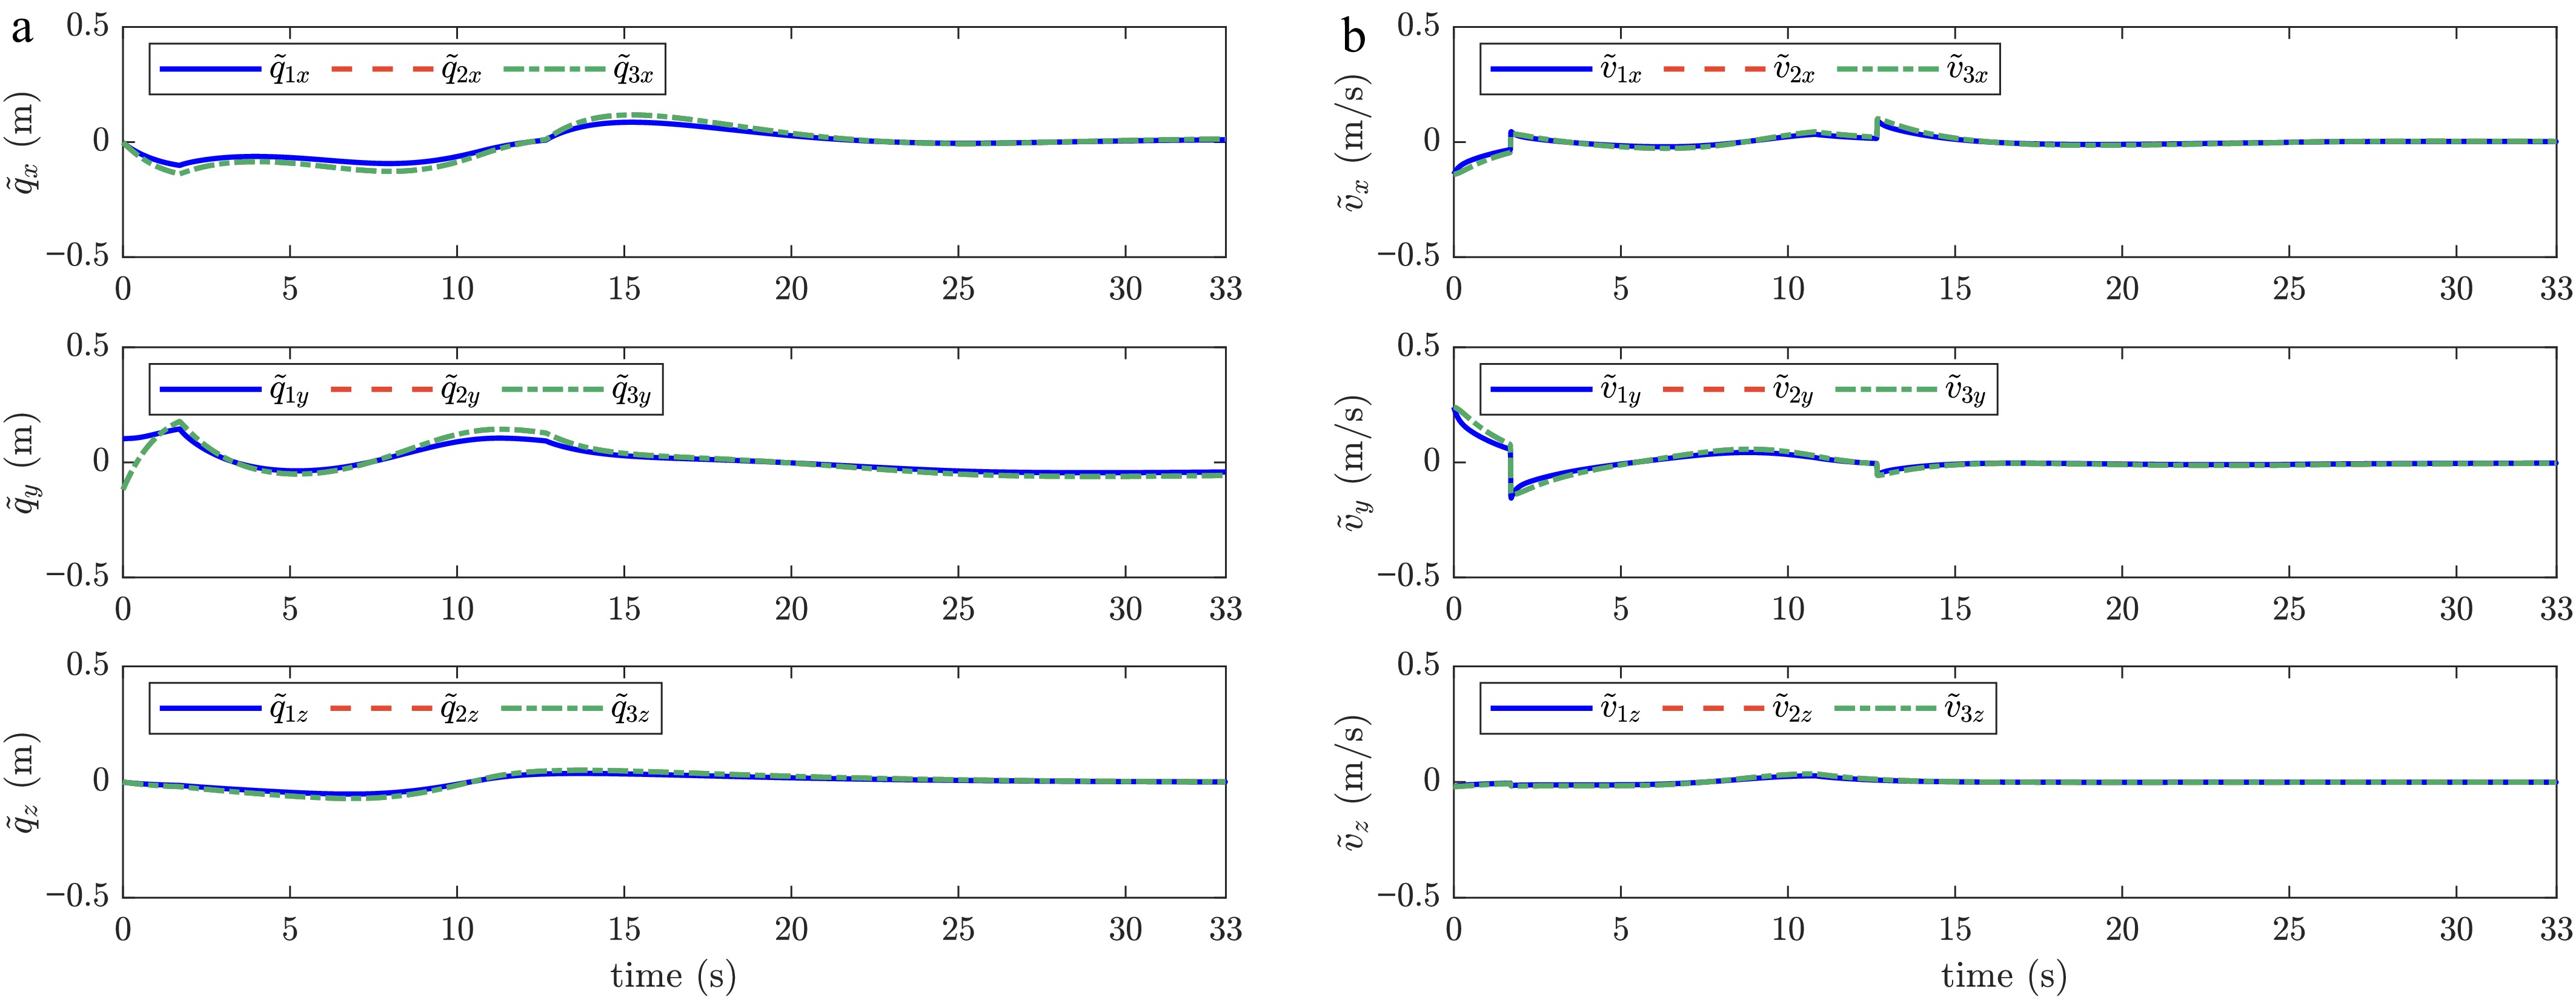
Figure 7.
Response curves of the formation tracking errors under the distributed reference signal generator given by Eqs (16) and (17) in example 2. (a) Response curves of the formation position errors. (b) Response curves of the formation velocity errors.
-
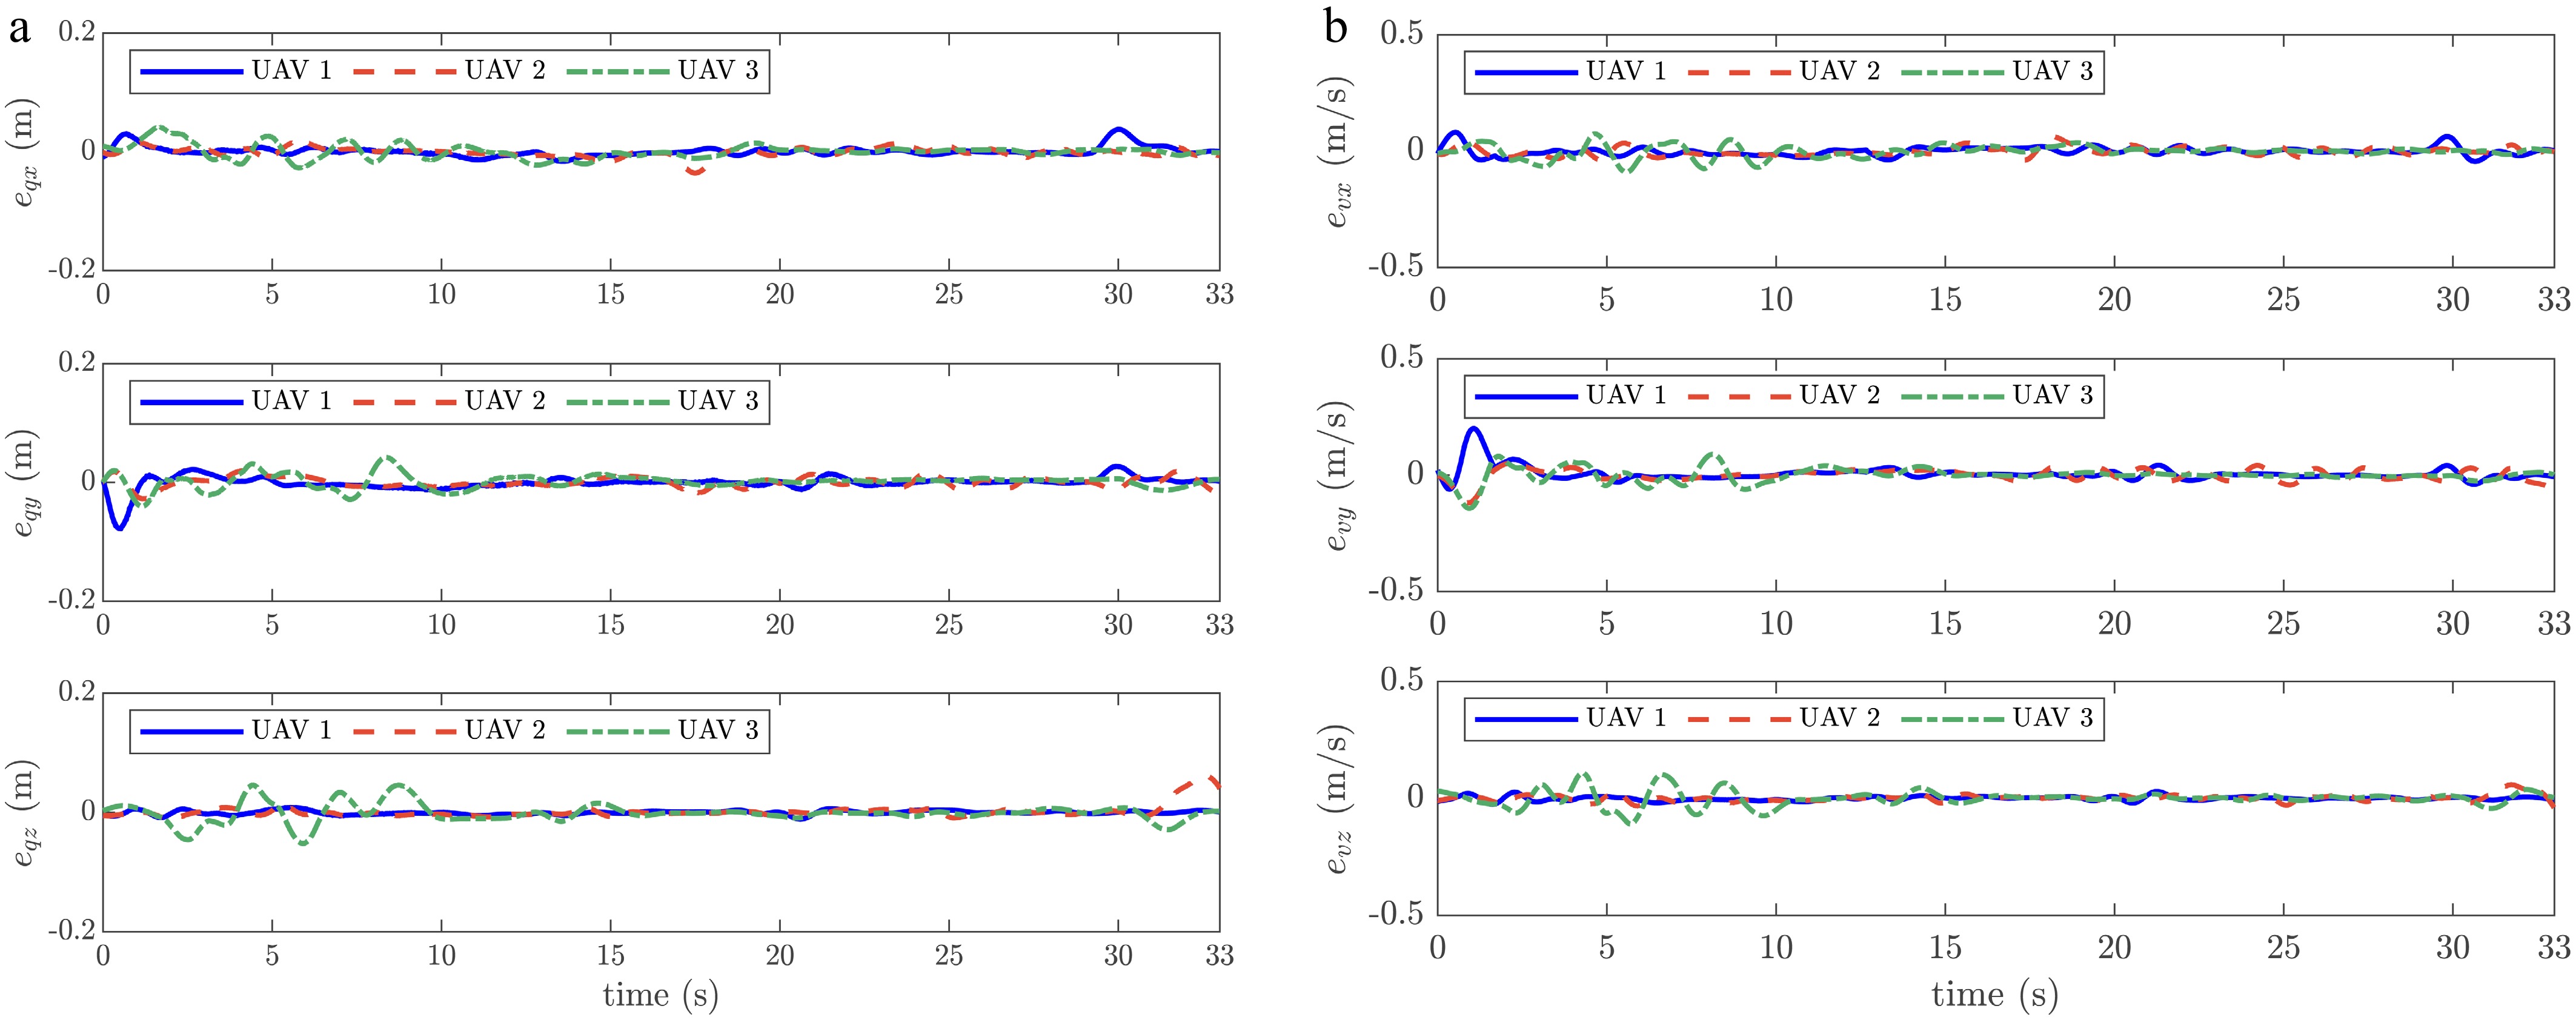
Figure 8.
Response curves of the multi-quadrotor UAVs' trajectory tracking errors under the composite controller given by Eq. (28) in example 2. (a) Response curves of the position tracking errors. (b) Response curves of the velocity tracking errors.
Figures
(8)
Tables
(0)